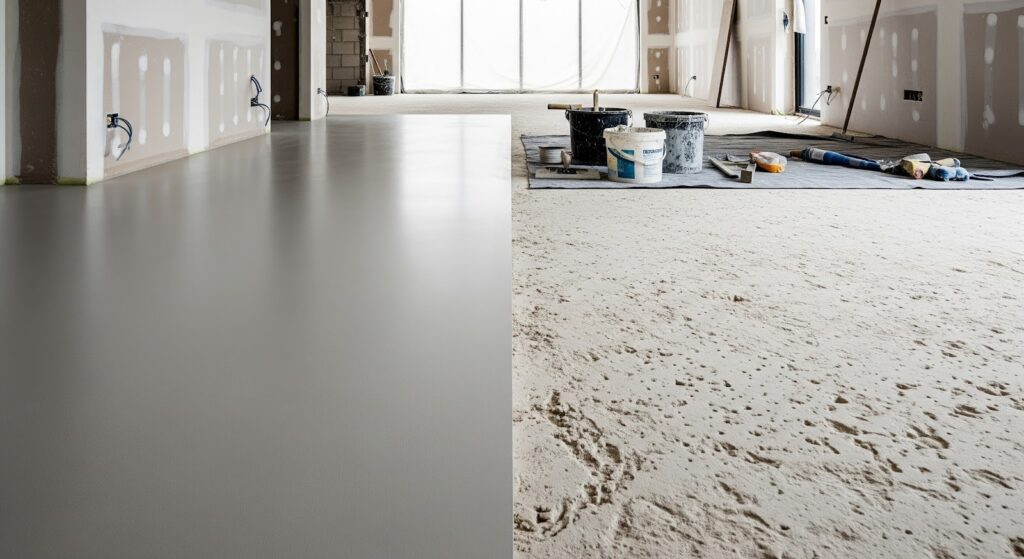
Microcement flooring has become a popular choice for achieving a seamless concrete look in apartments, condos, and modern interiors. At the same time, many residential and mixed-use buildings use gypcrete as a subfloor, especially in multi-story construction for sound control and fire ratings. This combination often leads to an important and very practical question.
Can microcement flooring be installed over gypcrete safely and successfully.
The answer is yes, but only under specific conditions and with the correct preparation method. Gypcrete behaves very differently from concrete or plywood, and ignoring those differences can lead to cracking, delamination, or complete floor failure.
This guide explains the real risks, the genuine benefits, and the best professional method for installing microcement over gypcrete.
Can Microcement Flooring Be Installed Over Gypcrete
Yes, microcement flooring can be installed over gypcrete, but only when the gypcrete is structurally sound, fully cured, properly sealed, and reinforced with the correct bonding system.
Microcement should never be applied directly onto untreated or weak gypcrete. Gypcrete is softer, more porous, and more moisture-sensitive than traditional concrete. Without the right preparation, it cannot support a cement-based decorative finish.
When the substrate is stabilized and isolated correctly, microcement becomes one of the most effective finishes for gypcrete subfloors.
What Gypcrete Is and Why It Behaves Differently
Gypcrete, also known as gypsum concrete, is a lightweight underlayment commonly used in multi-family buildings. It is poured over wood or concrete subfloors to improve sound insulation and fire resistance.
Unlike concrete, gypcrete:
- Has lower compressive strength
- Is highly porous
- Absorbs moisture easily
- Has limited surface durability
These characteristics make gypcrete unsuitable for direct decorative finishes without treatment.
Why Gypcrete Can Be Risky Under Microcement?
Microcement relies on strong surface adhesion and controlled substrate movement. Gypcrete presents challenges in both areas.
Primary Risks
- Weak surface strength leading to delamination
- Moisture absorption causing bond failure
- Dusting or surface erosion
- Cracking due to subfloor softness
- Inconsistent curing behavior
If these risks are not addressed, the microcement system may fail even if the finish itself is high quality.
The Biggest Mistake People Make With Gypcrete
The most common failure occurs when installers treat gypcrete like concrete.
Grinding it aggressively.
Skipping sealing steps.
Applying microcement directly.
This approach almost always leads to separation or cracking. Gypcrete must be stabilized before it can carry any cement-based finish.
Benefits of Microcement Flooring Over Gypcrete
When installed correctly, microcement offers several advantages over other flooring options for gypcrete subfloors.
Key Benefits
- Lightweight system suitable for upper floors
- Thin application that does not raise floor height
- Seamless appearance without joints or grout
- Modern concrete aesthetic
- Compatibility with radiant heating systems
- Lower structural load than tile or concrete
These benefits make microcement especially attractive for apartments, condos, and renovation projects where gypcrete is already in place.
Why Traditional Concrete and Tile Often Fail on Gypcrete
Many flooring failures occur because materials that are too rigid are installed over a soft substrate.
Traditional concrete is too heavy and brittle.
Tile relies on rigid bonding and cracks easily when gypcrete flexes.
Stone flooring adds excessive weight and stress.
Microcement, when reinforced properly, adapts far better to the mechanical behavior of gypcrete.
The Best Method for Installing Microcement Over Gypcrete
The correct installation method focuses on isolation, reinforcement, and moisture control rather than direct bonding.
Step One: Verify Gypcrete Condition
The gypcrete must be:
- Fully cured according to manufacturer timelines
- Dry with moisture levels within specification
- Free of cracks, crumbling, or dusting
- Structurally sound and stable
Any weak or damaged areas must be repaired before proceeding.
Step Two: Surface Stabilization and Sealing
Gypcrete must be sealed to prevent moisture absorption and surface breakdown.
This typically involves:
- Penetrating sealers to bind surface particles
- Consolidation primers designed for gypsum substrates
This step transforms the surface from soft and dusty into stable and bond-ready.
Step Three: Isolation and Reinforcement Layer
A flexible isolation layer is essential.
Common methods include:
- Fiberglass mesh embedded in base coats
- Flexible resin membranes
- Crack isolation systems compatible with microcement
This layer absorbs minor movement and prevents stress transfer from the gypcrete to the microcement finish.
Step Four: Microcement Application
Once the substrate is stabilized and reinforced, microcement can be applied in multiple thin layers.
Key principles include:
- Controlled thickness
- Proper curing between coats
- Consistent trowel technique
- Avoiding excessive build-up
Thin application reduces stress and improves long-term performance.
Step Five: Sealing and Protection
The final sealing system is critical.
High-quality sealers:
- Protect against moisture penetration
- Improve abrasion resistance
- Prevent staining
- Increase longevity
Moisture Management Is Non-Negotiable
Gypcrete and moisture do not mix well.
Before installation:
- Moisture testing must be completed
- HVAC systems should be operational
- Bathrooms and kitchens may require additional waterproofing
Ignoring moisture control is one of the fastest ways to destroy both gypcrete and microcement layers.
Where Microcement Over Gypcrete Works Best
This system performs best in:
- Living rooms
- Bedrooms
- Hallways
- Home offices
- Condos and apartments
- Retail interiors
Bathrooms and kitchens require enhanced waterproofing systems but are still possible with proper detailing.
Weight and Structural Advantages
One of the biggest benefits of microcement over gypcrete is weight efficiency.
Microcement adds minimal load compared to tile or stone.
This makes it ideal for multi-story buildings with strict load limits.
Maintenance and Durability
When installed correctly, microcement over gypcrete is durable and low-maintenance.
Typical care includes:
- Gentle cleaning
- Avoiding harsh chemicals
- Periodic resealing when recommended
The system does not require grout maintenance or frequent repairs.
When Microcement Over Gypcrete Is Not Recommended
This system should be avoided if:
- Gypcrete is soft, crumbling, or damaged
- Moisture problems cannot be resolved
- Structural movement exceeds tolerance
- Installation shortcuts are required
In these cases, alternative flooring systems should be considered.
Conclusion
Microcement flooring over gypcrete is possible, but only when the risks are understood and the correct installation method is followed. Gypcrete is not concrete, and it cannot be treated as such. Success depends on stabilizing the substrate, isolating movement, controlling moisture, and applying microcement in thin, reinforced layers.
When done properly, microcement delivers a seamless, lightweight, and modern floor finish that performs well over gypcrete in residential and light commercial environments. The system approach matters far more than the product name.
FAQs
Can microcement be applied directly on gypcrete?
No. Gypcrete must be sealed, stabilized, and reinforced before microcement application.
Will microcement crack over gypcrete?
It can crack if movement is not isolated properly. Reinforcement layers are essential.
Is microcement lighter than tile over gypcrete?
Yes. Microcement is significantly lighter and better suited for upper floors.
Does gypcrete need waterproofing before microcement?
Yes. Moisture control and sealing are critical for long-term success.
Is microcement over gypcrete suitable for apartments?
Yes. It is commonly used in apartments and condos when installed professionally.